Do you know the importance of printed circuit board assembly for electronic equipment? In modern technology, PCB assembly is one of the key links in electronic equipment manufacturing, and PCB assembly is used in various application fields. It is more than simply connecting electronic components together, it is a key step to ensure the stability and reliability of the circuit board.
The process of PCB assembly involves soldering electronic components to a printed circuit board and testing them to ensure they are functioning properly. By cleverly arranging components, PCBs can implement a variety of complex circuit functions, such as control, communication, and data processing.
Whether you are an electronics hobbyist or a professional practitioner, learning PCB assembly is an essential skill for you. It not only helps you repair and improve existing equipment but also inspires you to create new electronic products. So, unveil the secrets of PCB assembly, improve your electronics skills and expertise, and equip yourself with the skills to better understand and repair electronic devices.

PCB assembly is the soldering of electronic components onto a pcb
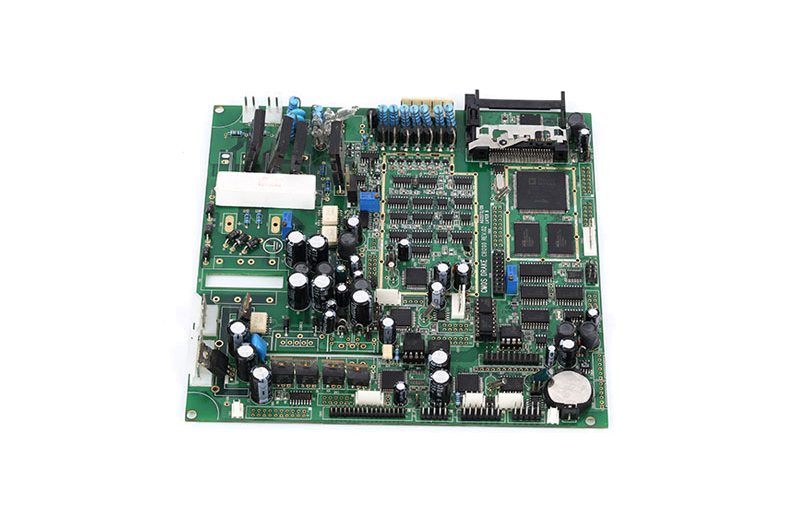
Have you ever looked at a circuit board where the components are firmly glued to the board? Never think of them as decorations on the PCB board. Advanced circuit boards can only perform their functions if components are installed on them. A PCB loaded with components is called an assembled PCB, and its manufacturing process is called PCBA for short. Copper wires on the bare board, called traces, electrically connect connectors and components to each other. They run signals between these functions, allowing the board to operate in a specifically designed manner. The features range from simple to complex, but the PCB may be smaller than a thumbnail.
PCB assembly begins with designing the circuit layout using computer-aided design (CAD) software. The design is then translated into a physical board by etching the copper layer and drilling holes to place components. Next, electronic components such as resistors, capacitors, integrated circuits, and connectors are carefully soldered to the designated locations on the PCB. Once all components are securely connected, the final step is to conduct thorough testing to ensure the correct functionality of the assembled PCB.
PCB assemblies come in many types, suitable for specific applications. Single-sided PCBs are the most basic and cost-effective, with components mounted on only one side. Double-sided PCBs have components mounted on both sides, increasing circuit density and functionality. Multilayer PCBs consist of multiple layers of conductive materials separated by insulating layers, providing greater circuit complexity and compactness. Flexible printed circuit boards are made of flexible materials that allow them to conform to irregular shapes. Each type of PCB component serves a unique purpose and is carefully selected based on the requirements of the electronic device it will be integrated into.

Finished board after all components are soldered and mounted on the PCB
With the popularity of electronic products, the demand for PCB assembly has also increased. The detailed steps of PCB assembly cover the entire process from component procurement, PCB manufacturing, component installation, welding, testing to quality control.
Before PCB assembly, component procurement first needs to be carried out. Choosing reliable suppliers and high-quality components is very important because they directly affect the quality and performance of the final product.
(1) Choose suppliers with good reputation and reputation
Research through experiences with other manufacturers and consider their reviews and feedback. Additionally, check the supplier's qualifications and certifications to ensure they are qualified and meet quality standards.
When selecting a supplier, clarify the supply cycle and inventory status of components to ensure that PCB assembly can be completed on time. In addition, it is important to know the supplier's inventory status so that components can be replenished and replaced in a timely manner.
(2) Pay attention to the quality of components
When selecting components, you need to pay attention to their quality and reliability. This can be assessed by reviewing the technical specifications and quality assurance documentation provided by the supplier. Samples can also be requested for testing and verification to ensure they meet product needs and performance requirements.
PCB manufacturing is a crucial step in the entire assembly process, which directly affects the performance and reliability of the circuit board.
(1) Design principle
This is an important step in determining the functionality and layout of the board. PCBA Design principles need to consider factors such as circuit complexity, signal transmission, and power supply to ensure that the circuit board can work properly.
(2) Choose appropriate materials
Choosing the right materials can improve the quality and durability of your circuit board. Commonly used PCB materials include FR-4 fiberglass materials and copper foil. Depending on the board's needs and application area, it is important to choose the right material.
(3) Manufacturing process
The manufacturing process includes steps such as printing, etching, drilling, and film pasting. These steps require strict control to ensure the accuracy and reliability of the circuit board.
Component mounting is the installation of various electronic components onto the PCB to create a complete circuit board. Component installation can be done manually or automatically, depending on the production scale and requirements.
(1) Manual installation
Manual installation is a traditional method that requires skill and experience. During manual installation, operators use tweezers, solder and other tools to precisely place components on the PCB one by one. This method is useful for low-volume production or components that require special handling, as it provides greater flexibility and control.
(2) Automated installation
Automated installation, also known as Surface Mount Technology (SMT). In SMT, specialized equipment and machines are used to automatically grab components from the feeder and accurately place them at predetermined positions on the PCB. This method is suitable for high-volume production because it improves production efficiency and accuracy.
Whether it is manual installation or automated installation, there are some key tips and precautions that need to be paid attention to. First, make sure you use the correct tools and equipment to ensure correct installation and connection of components. Second, carefully check the component pins and pads on the PCB to make sure they are aligned and not damaged. In addition, attention needs to be paid to the correct installation sequence to avoid interference and conflicts between components.
After the components are installed, welding is the process of connecting the components to the PCB to ensure that they are firmly fixed in the correct position, ensuring that the components are reliably connected to the PCB and can work properly. Soldering can be performed using a soldering iron or specialized soldering equipment. The soldering process requires the correct temperature and time to avoid overheating or damaging components, choose the appropriate welding method according to the requirements of the project and the type of components.
(1) Manual welding
Also known as hand-mounted chip soldering. It is done by placing the components on the PCB and using hot air or soldering iron to heat the solder so that it melts and connects to the PCB. This soldering method is suitable for smaller components and SMT.
(2) Wave soldering
SMT suitable for jack components and recessed pins. In wave soldering, the entire PCB is immersed in a wave of solder, and the heat of the wave melts the solder and connects to the PCB. This method can solder large quantities of PCBs quickly and efficiently.
(3) Reflow soldering
This method works by heating the entire area on the PCB, causing the solder to melt and connect with the PCB. Reflow soldering is suitable for PCBs with higher component density and more complex layouts. It ensures soldering reliability and consistency while reducing the thermal impact on components.
In the PCB assembly process, the testing link is a key step to ensure the function and performance of the circuit board. Whether it is a single-sided PCB or a multi-layer PCB, testing is essential.
(1) Visual inspection
Visual inspection to ensure all components are installed correctly in their designated locations. This includes checking that solder joints are tight, components are properly aligned, and that no components are missing or damaged.
(2) Connectivity test.
Verify connectivity between various points on the circuit board by using professional test equipment, such as a multimeter or test fixture. Test equipment will check every connection and solder point on the circuit board to ensure proper signal transmission and connection reliability.
(3)Functional testing
Verify that the various functions of the board are working properly by applying appropriate electrical or input signals. These tests may include input and output signal testing, supply voltage testing, timing testing, etc. By conducting comprehensive functional testing, the stability and performance of the board under various operating conditions can be ensured.
(4) Quality control inspection
Including checking whether the appearance of the circuit board is intact, whether the logo is clearly visible, whether the components meet the specifications, etc. In addition, temperature and humidity testing can also be performed to test the reliability and stability of the circuit board under different environmental conditions.

PCB assembly process should be strictly controlled to ensure the accuracy and reliability of the circuit board
During the PCB assembly process, you may encounter some common problems. Understanding these issues and their solutions can help you perform better assembly jobs and improve quality control and product reliability.
When installing components, installation errors may occur, such as misalignment, reverse installation, or bent pins. To resolve this issue, you can take the following steps:
- - Carefully check and compare with the components list to ensure each component is installed correctly.
- - Use appropriate tools and techniques to ensure components are correctly inserted into the PCB, paying attention to orientation and polarity.
Welding is a critical step in PCB assembly, and poor welding or short circuits at solder joints may occur. Here are some workarounds:
- - Ensure proper operation and maintenance of soldering equipment and tools, such as temperature control, solder quality, etc.
- - Check the solder joints regularly, using a microscope or magnifying glass to ensure the quality and connection status of the solder joints.
During the PCB assembly process, components may be damaged, such as electrostatic discharge, physical collision, etc. To prevent and resolve this type of problem, you can consider the following measures:
- - Follow correct ESD protection measures, such as using static eliminators and wearing anti-static gloves.
- - Before installing components, perform necessary cleaning and inspection to ensure that the components are not damaged and intact.
After PCB assembly is completed, functional testing and quality control are required. If something goes wrong with your test, you can take the following actions:
- - Check test equipment and tools for accuracy and reliability.
- - Ensure the correctness and completeness of testing procedures and methods.
- - For problematic PCBs, repair or replace components to ensure product quality and performance.

When selecting components for PCB assembly, you need to pay attention to their quality and reliability
When doing PCB assembly, it is crucial to find ways to save time and costs. Here are some practical tips and strategies.
Establish long-term relationships with reliable suppliers and ensure they can provide high-quality components at competitive prices. At the same time, rationally plan material procurement to avoid too much or too little inventory to reduce waste and costs.
Work with experienced and reputable manufacturers to ensure high-quality PCB manufacturing. This reduces possible errors and returns and avoids unnecessary redoing and delays.
The use of automated equipment and technology, such as placement machines and reflow ovens, can greatly increase installation speed and accuracy. Additionally, training technicians on proper installation techniques and procedures is key.
During the welding process, ensure proper thermal management and welding parameter control to avoid welding defects and quality issues. Regularly inspect and maintain welding equipment to ensure its normal operation and stability.
Establish a comprehensive testing strategy that includes functional, electrical, and reliability testing to ensure every component and connection is working properly. Through testing, potential problems can be discovered and resolved early, improving product quality and customer satisfaction.
Establish a quality management system and formulate standards and processes to ensure that every step meets quality requirements. Conduct regular quality audits and evaluations to continuously improve and optimize the assembly process.

Strict PCBA Quality Control
Check whether the performance and functionality of the components meet requirements and whether there are any potential issues or bottlenecks. This can be done by testing and analyzing various aspects of the board. If there are any issues or room for improvement, it’s time to move on to the next step.
Based on the results of the assessment, components that need to be replaced or upgraded are determined. When sourcing new components, make sure they are compatible with the original circuit board and have the required performance and functionality. When replacing components, it is important to follow proper operating procedures and safety measures to avoid any potential damage or problems.
Install new components onto the circuit board, making sure the solder connections are tight and reliable. Before soldering and installing, clean the circuit board to ensure the surface is clean, and pay attention to correct temperature and time control to avoid overheating or poor soldering.
After completing the welding and installation, conduct testing and quality control. Perform comprehensive functional and performance testing of the board using appropriate test equipment and tools. Make sure all components are working properly and the board operates reliably under a variety of conditions. If there are any problems or defects, repair and adjust them promptly.
Put the board into a real application environment and perform long-term operational testing and monitoring. Collect data and feedback to evaluate the effectiveness of upgrades and improvements. Based on the results, make necessary adjustments and optimizations to ensure the board achieves expected performance and functionality.
By following these steps, you can successfully upgrade and improve your assembled circuit board. Always follow correct operating procedures and safety guidelines during upgrades and improvements